skip to main |
skip to sidebar
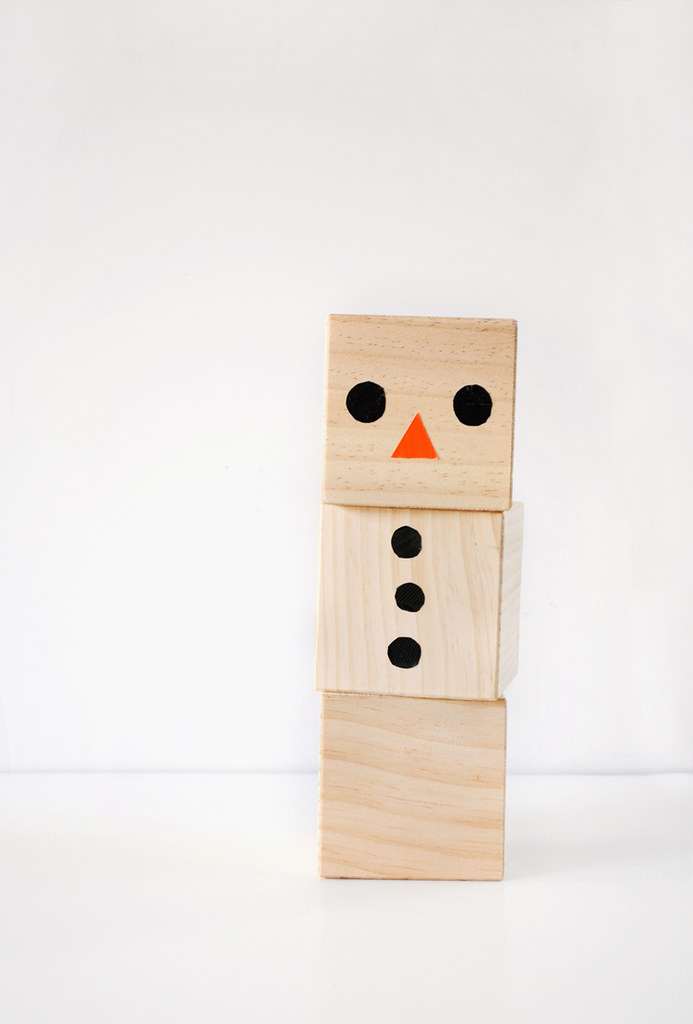
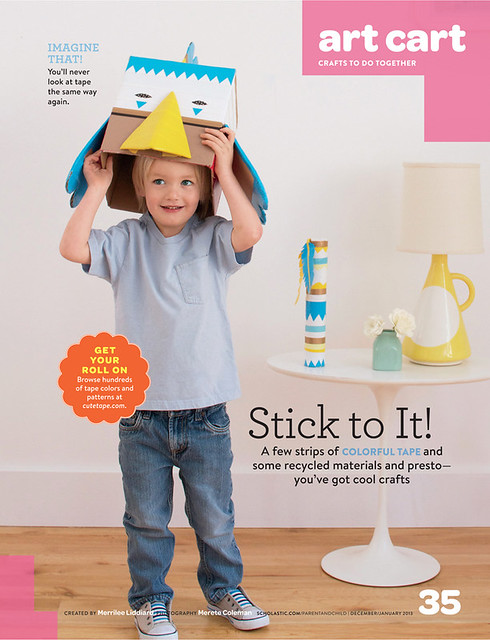
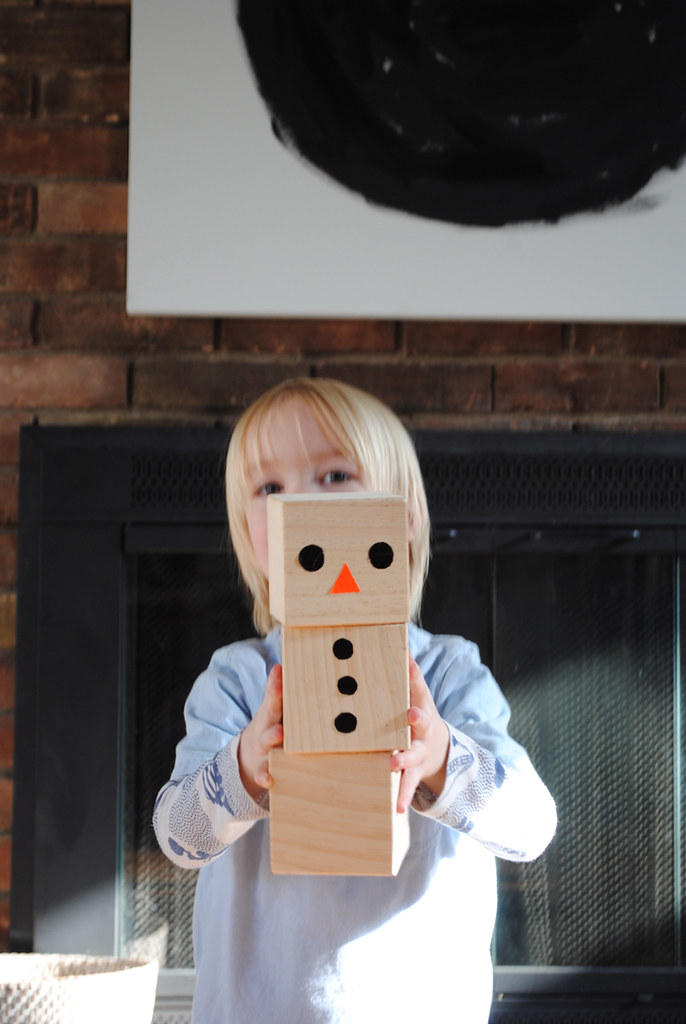
It's a serious winter wonderland outside right now. And that can only mean one thing...that it's time for snowman building!! And OK, yes the authentic frolicking in the snow and assembling Mr. Frosty with mittens and frostbitten noses is a great way to go...but I'm thinking once that in through, we need to come indoors for some hot cocoa and a much warmer snowman building of sorts.

And this simple modern snowman is just the ticket. I was over the moon to find these large blocks at our local craft store (thinking some more mix-n-match um's are in order with these puppies) and knew that our friend Frosty needed to come to life.
We kept it super simple with just a set of eyes, a triangle nose and some buttons. We made them with our favorite craft supply de jour, duct tape, but you can paint yours on if you like. Have fun with it!
My mother-in-law has a great after-Christmas tradition where she brings out all things wintery and snowman related to keep the after-holiday blues at bay. I love this idea. And our simple frosty block friend is just what we need to keep us merry and bright, even when the tree comes down.
What about you? Any after Christmas/New Year traditions that help keep your spirits up? I'd love to hear what you do and any great tips you might have. Thanks!

Merry Christmas from all of us over here at Mer Mag! I hope you had a most lovely holiday and are gearing up for a great new year.
This year has been incredibly good to us and we feel blessed to have shared it with all of you. We have so much fun in store for 2013 (ALT! We are working on our first kids craft book!! - maybe a facelift for Mer Mag, etc.). But first we are happy to reflect on the joy and peace we feel this season. There is so much to be grateful for - new babies, happy times together, fun opportunities here at Mer Mag and much much more. We thank you for going on this journey with us and hope to share more times together with you in the new year.
Love, peace and joy to all of you.
xo
Mer
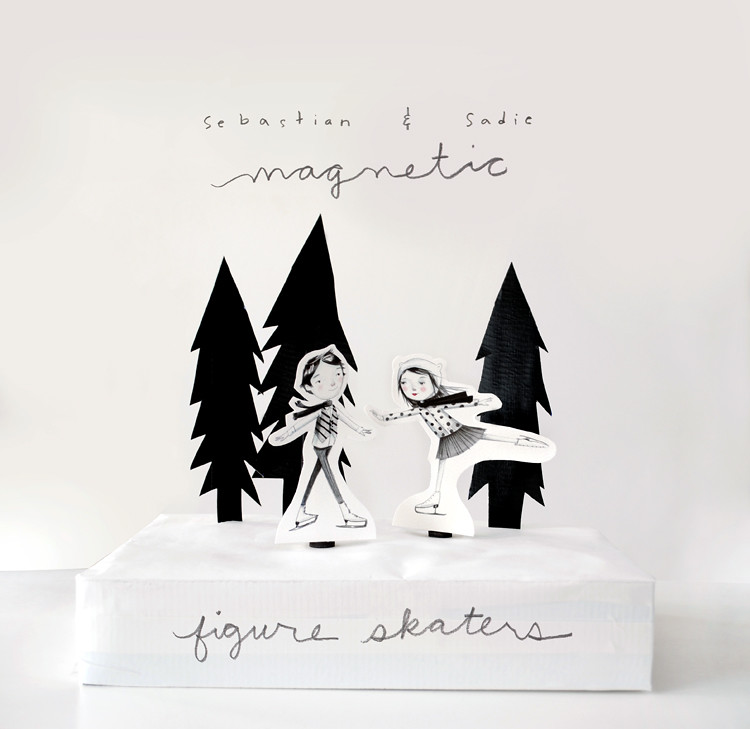
School is out for winter break and if you are like me, you need fun activities to keep little hands busy, busy, busy. Well expert figure skaters, Sebastian and Sadie, are here and ready to help with that!
To get started, purchase the download here for only $3.99, complete with both figure skaters and three tree shapes. Print out the figure skaters (I recommend using fine art heavy card stock or taking the file to your local print shop for the best quality of print) and cut them out. Cut out support tabs and glue long vertical strip to back of skater for support. (I find it's also helpful to add a piece of thick foam or cardboard for additional support).
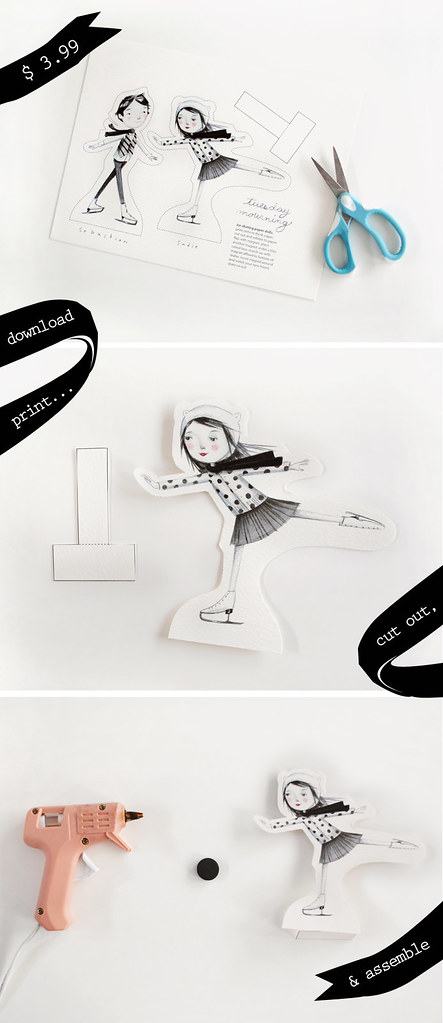
Now using hot glue, adhere magnet to the bottom of the flap of skater
Once the glue is dry you are ready to try out your new skater on the "ice"!
To create your ice rink, take a large discarded cereal box and place it on it's side. You may cover it in white butcher paper before hand if you like, leaving one end open. Create slits in the box where you'd like your trees to go. Print out tree shapes. (You can keep them as is or cover them in black duct tape as we did here). Place large tongue depressors to the backs of the trees. Now you are set to place your trees within the slits you created in your large box.
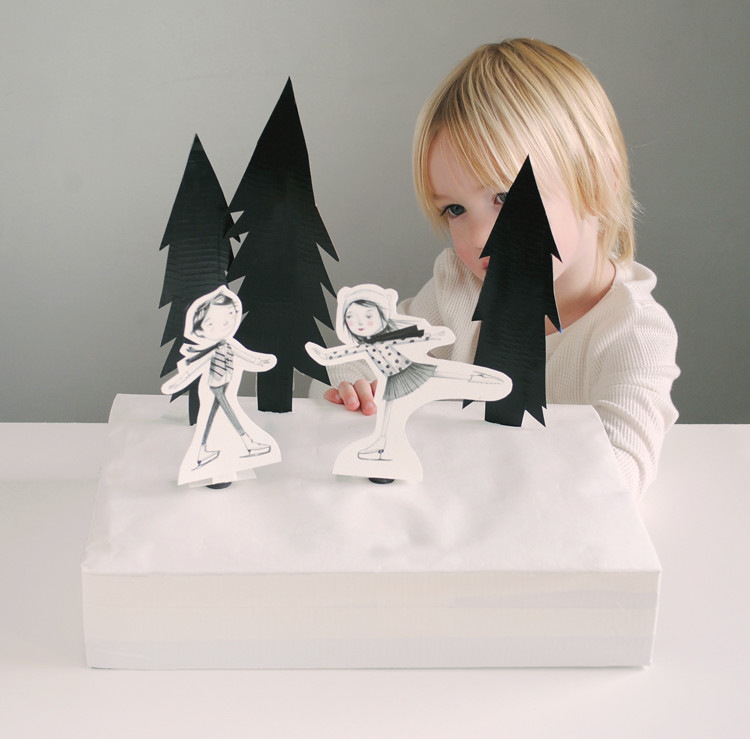
Place your skater a top the box and than place a corresponding magnet
within the cereal box and directly below the skater. Magnets should meet
up. You are now ready to move your skater around on the ice! So fun!!
These make a great stocking stuffer or craft/toy to play an create with friends and family members during these winter months! Hop on over to the shop to get started on your very own skaters now!
(download will be emailed to you after purchase)
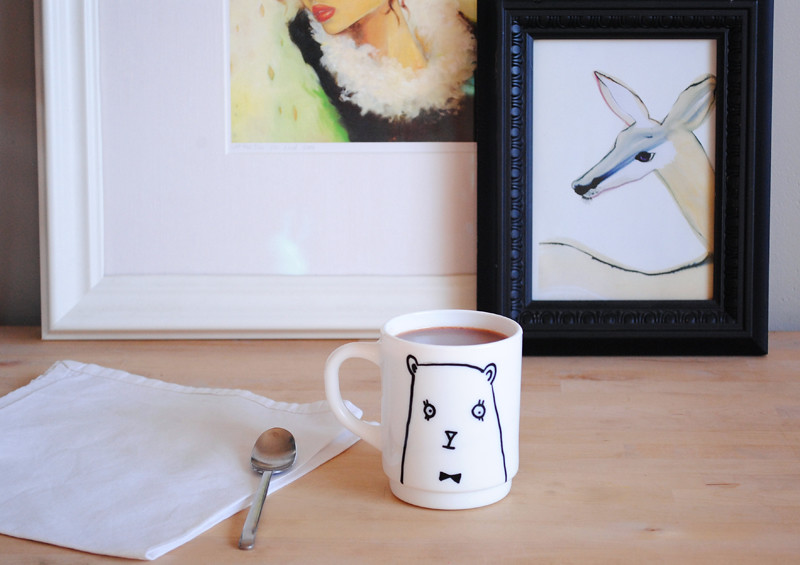
If you are like me you relish the season of scarf wrapping, boot wearing and cocoa sipping. And if you have this cute little handmade bear mug greet you each morning with your favorite warm beverage, well 'tis the season to be jolly indeed!
So head on over to Design Sponge for this weeks DIY gift idea. This little guy is so super simple to make. I promise. You'll be able to mark off quite a few gifts on your list with this furry buddy!

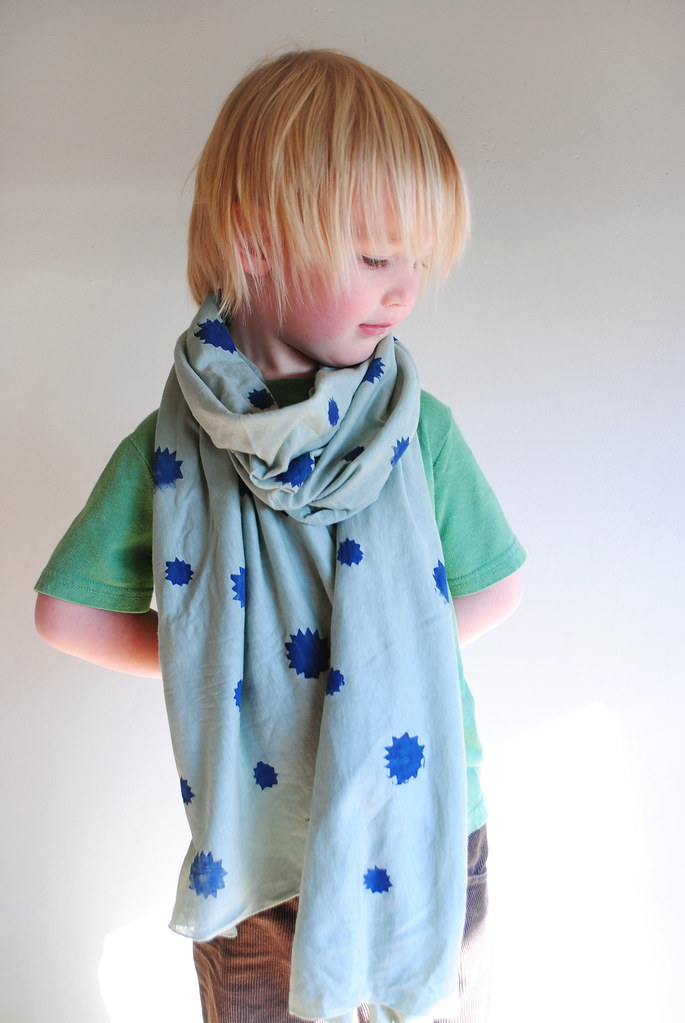
And because we know you might still have a few last-minute gifts to check off that list, we are sharing not one, but two DIY's with you this week! This no-sew hand stamped scarf is the perfect thing to make in an afternoon.
And don't be afraid to let little hands help with the gift creating and
giving. But be careful, they just might look so cute in your creation
you'll have to keep one just for them.
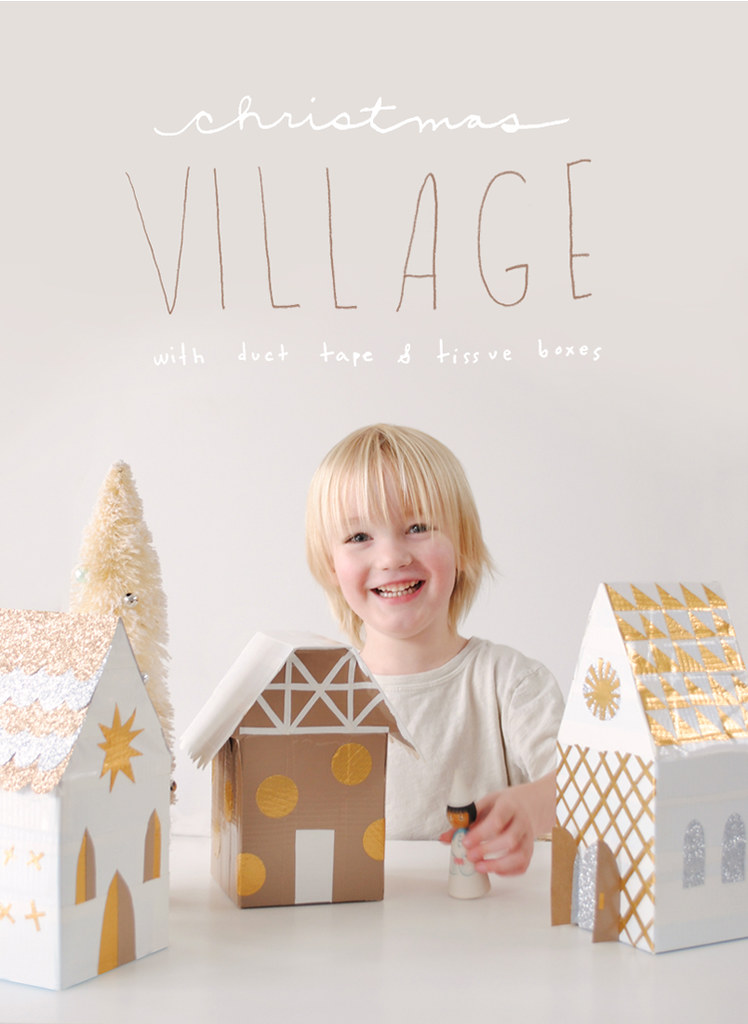
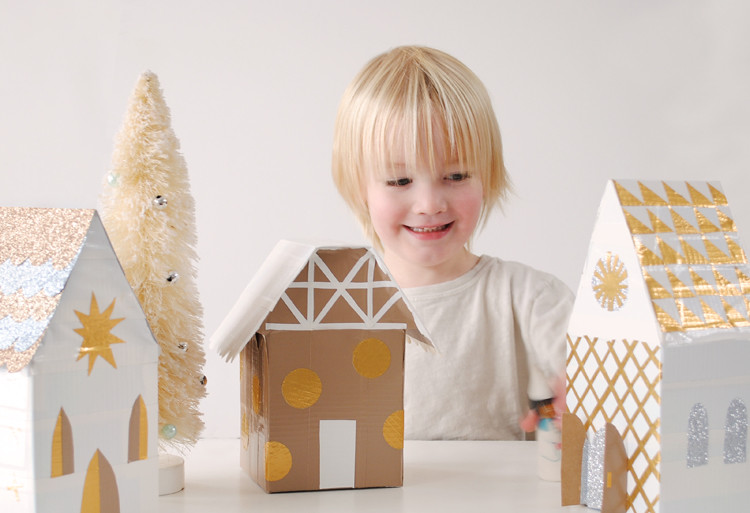
Good morning friends. It's snowing outside of my window as I type and it's looking like it just might be a white Christmas indeed. Yippee! Which means, after the snowball fights and snowman building, it is the perfect time to come inside, sit snugly indoors and create with my Littles.
I don't know about you but this time of year often brings about a case of the sniffles. Which means we have have number of tissue boxes lying around the house. Well the Littles and I discovered just the thing to do with them. Make a little Christmas village, using glitter and duct tape of course! So that is just what we did.
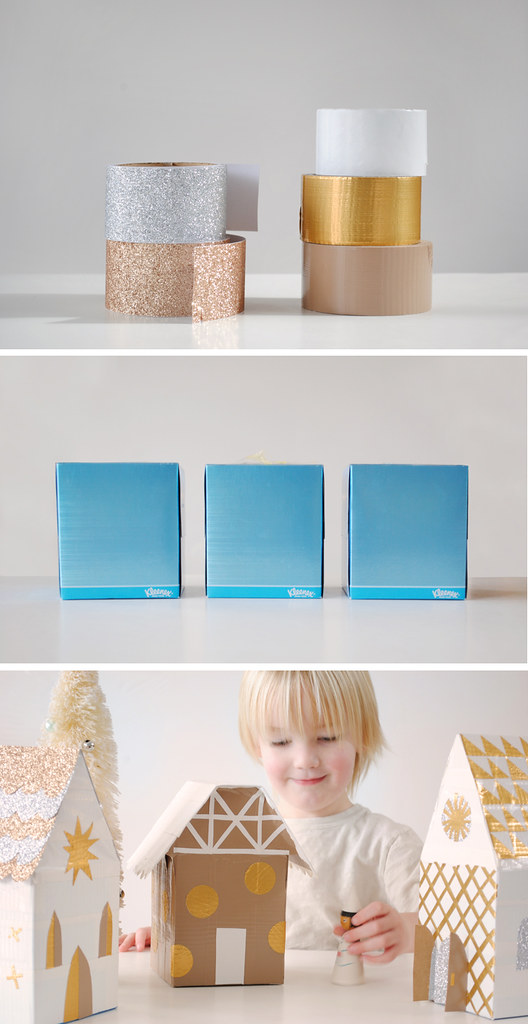
To make the structure of the roof tops, we just cut up a few other tissue boxes (or any other discarded cereal box, etc.) and created the roof shapes atop the tissue boxes. We then proceeded to cover them with the duct tape and then had lots of fun decorating them!
We were so excited to find this gold and silver glitter tape, from Martha Stewart, at Michaels, and knew right away that it needed to be used in our little village. I love how it makes the shingles sparkle and come to life (and an extra bonus - it's really easy to cut).
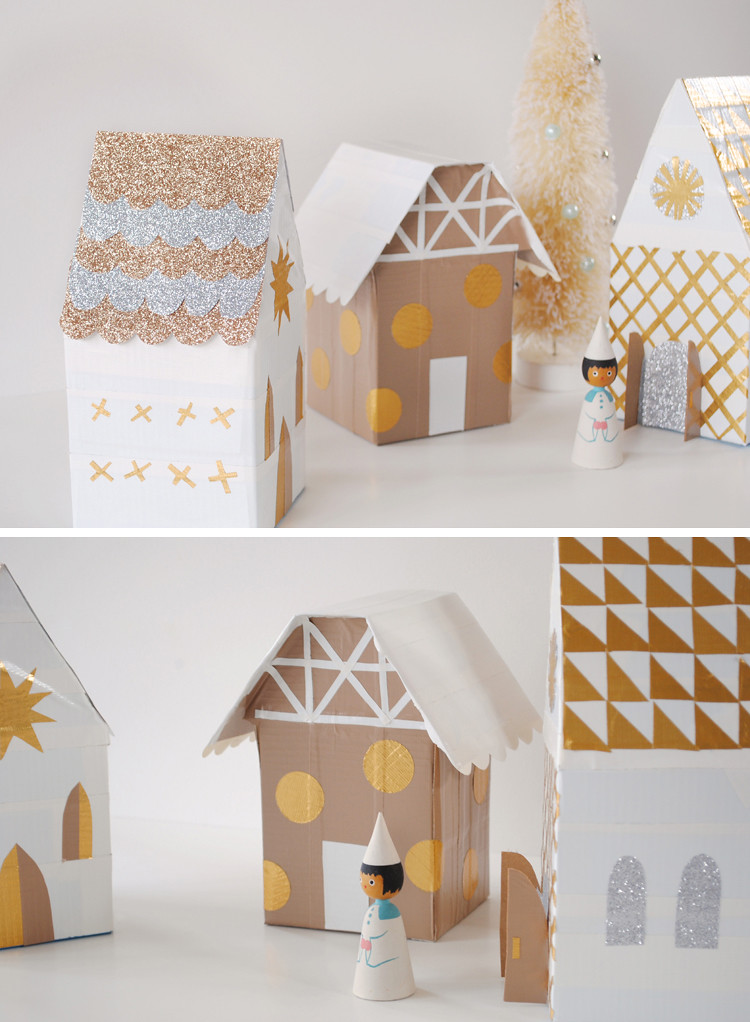
I also played around with our hole punch a bit and was able to create polka dots with the gold duct tape by spreading out the tape onto parchment paper prior to punching. With a little finesse, they turned out great! (In fact we have updated our duct tape cutting methods altogether. If you lay it out on the parchment, you can get a really nice clean cut with scissors and create just about any shape your heart desires! Best thing about it: the Littles can be more involved in the cutting stage now! Yippee! I'll have to do a tutorial of this new cutting method on the blog soon).
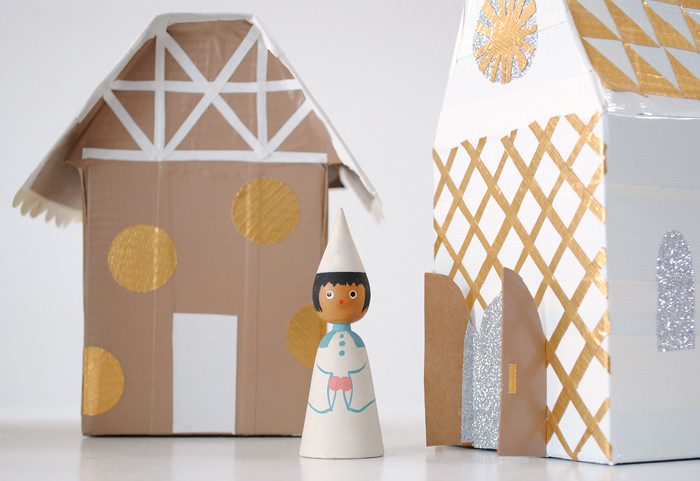
And our little vintage wooden angel is just the perfect friend to inhabit our little village. Makes me want to create a few more wooden friends for her to carol to.

And how cute would it be to cut out the window and door shapes and then add a few battery operated tea lights or even a strand of white Christmas lights on the inside? I just might have to do this variation in the next day or so. Would be so magical indeed!
Friends the Christmas countdown is on! But if we act fast we do still have time to purchase a number of items online. Which is why I'm sharing with you a great gift guide from one of my dear friends (who just happens to have incredible taste and two crazy adorable boys) Lorraine Galvin.
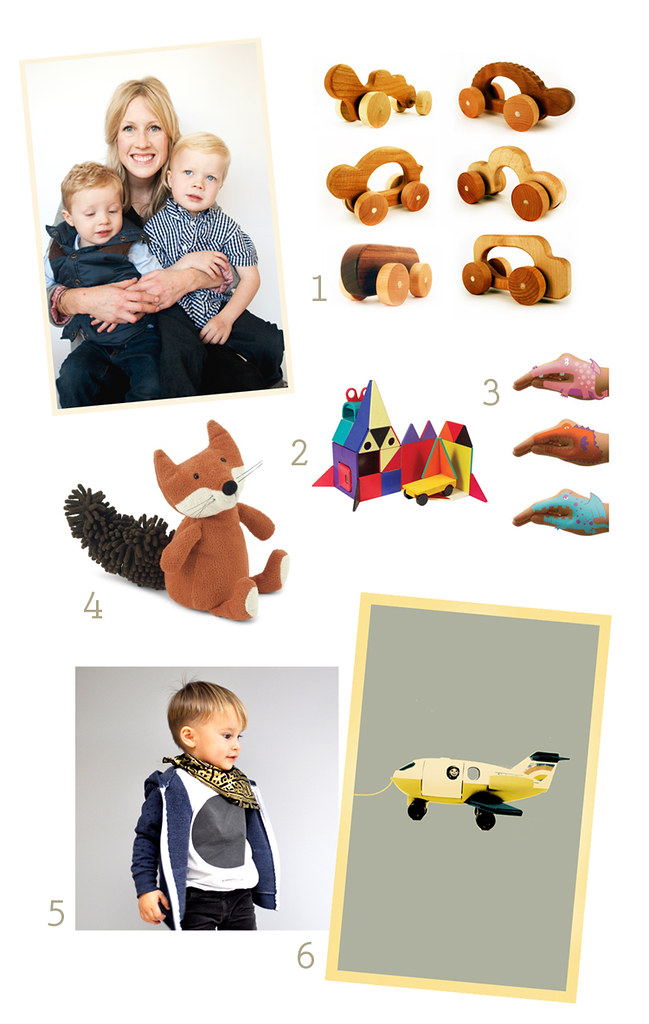
Here's what Lorraine has to say about her picks.
1. Tree Hopper Jalopies: These look so cute! I love the natural wood and handmade feel of them.
2. Magna Tiles: I have been waiting for Christmas to buy these
because they are a little pricey. Warren plays with them at preschool
and a dear friend suggested that I get a set every Christmas to build a
collection. I've already ordered and wrapped these! I can't wait to see
what they create with them.
3. Animal Hand Tattoos. Warren loves these things and we've been
giving them to his friends for their birthdays. I love the designs- and
they are only $5.99 at World Market.
4. Jellycat Noodle Fox: My kids each love their Jellycat and sleep
with them every night. One has a blue elephant and another a giraffe.
I've been eyeing this Jellycat Noodle Fox for a while, I think it's so
cute! (I know Jellycats may seem like old news, but they are tried and true
with my kids. They sell them at Anthro too!)
5. This clothing line just launched and I'll admit I couldn't wait until
Christmas for my kids to wear their new Munkstown gear. Belts, pants,
and sweatshirts are available as well. Love! (psst...psst....Lorraine's sister in-law is one of the founder's of this new line and it's incredible. we are huge fans too!!)
6. I LOVE South and Summer's graphic prints. My favorite is the airplane and my kids favorite is the robot.
Thanks Lorraine!! I'm so excited to know about Jellycat's. They may be old news to some but I had never hear of them. Such great picks!
What about you guys? Have you finished all of your Christmas shopping yet?
Hi friends! Today I'm sharing with you my love for all things alpine and snow peaked with this cozy little mountain pillow for your home. Head on over to Design Sponge for the full tutorial!


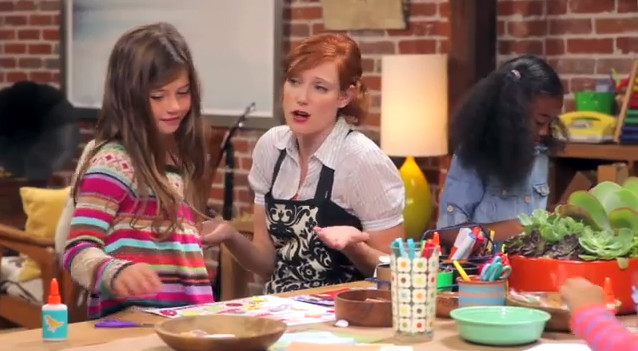
Have you guys heard of the new kids show, Ruby's Studio?! If not you are in for a real treat! It's a great kids show that is perfect blend of fun, helpful, endearing, playful and, thank goodness, not too cheesy. Oh, and best test of all - Little O loves it.

So you can imagine how thrilled I was when one of the founding mom's, Samantha Kurtzman-Counter, contacted me and asked if I would be interested in creating crafts for the kids to do on the show. After familiarizing myself with the company and the show, I felt like it was a perfect fit and couldn't have been more on board. And now I'm over the moon about sharing this show, and our crafts, with all of you!

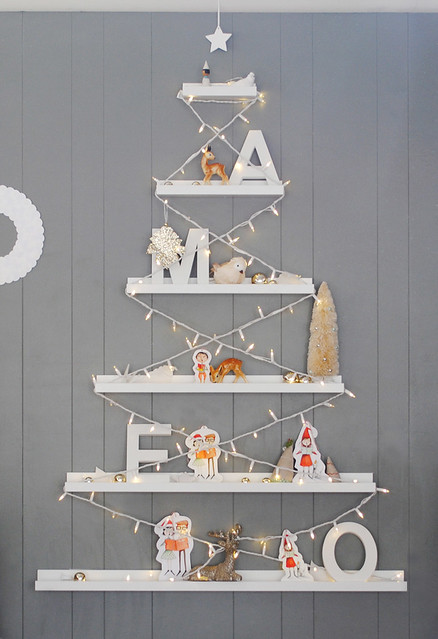
Out now is a delightful episode about friendship, which you can watch now by purchasing here. In it you will see just what you need to create our friendship tree.
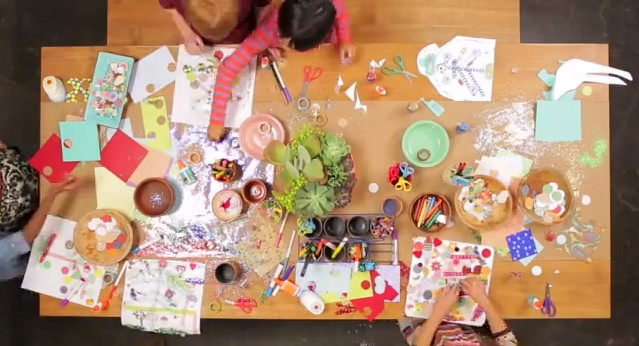
And as is always a thrill, I love seeing these little ones take this craft and make it their own. Seriously so great. Oh and can I just say that I want Ruby's studio. I mean isn't it the coolest? Perfectly designed to inspire creativity. Makes me want to get my craft on right now!
If you think you might be interested in this great show (and I know you will be!) take a look here. The premiere Feelings show is really great too. And stay tuned because both Ruby and I have a lot more episodes full of fun crafts for your little ones!

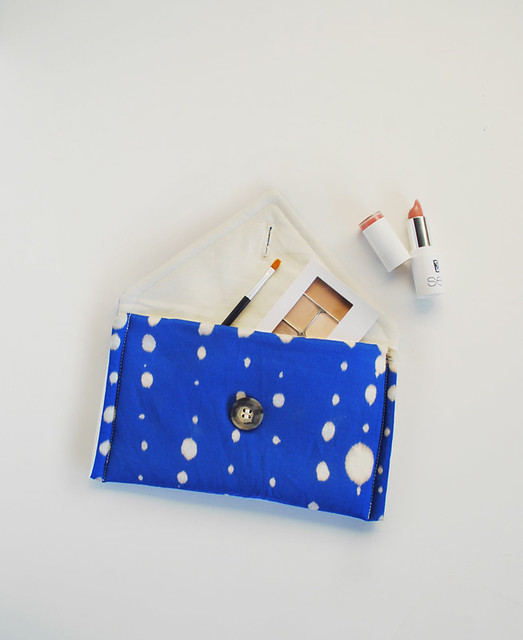
When Kate Pruitt, of Design Sponge, asked me if I wanted to contribute a few DIY crafts for us older "kids", just in time for the holidays, I jumped at the chance. You know that I'm completely enamoured with kids crafting but I welcomed the chance to kick up the sophistication a notch.
This week I will be sharing with you how to create your very own Bleach Dotted Clutch. This would seriously make the most perfect gift and trust me, it's very easy to make.
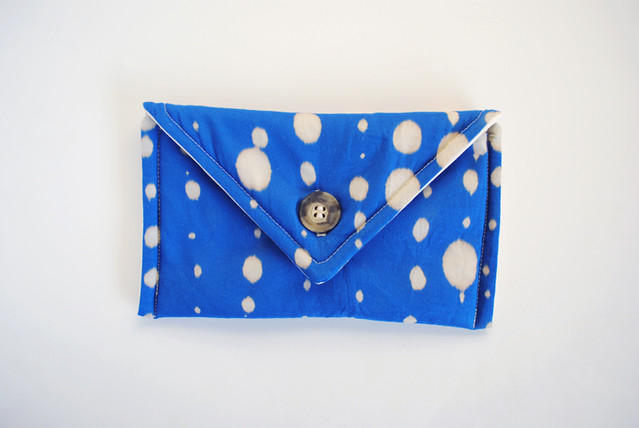
Hop on over the Design Sponge for the full DIY. But be careful, you just might fall in love with this so much, you'll want to keep it for yourself!
(and OK, since I just can't help myself, you could do this with the Littles too - particularly the 8 and up crowd. Just supervise the bleaching part. Otherwise it's seriously a great "learn how to sew" project! Perfect little pencil pouch.).

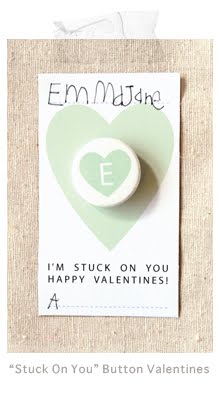
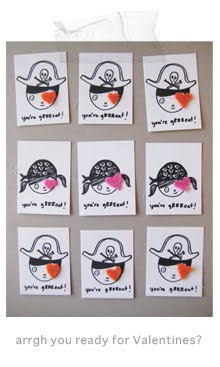
Hi Friends and happy Monday. I can't tell you how happy I am to start another week. Baby M is out of the hospital and just about over her RSV. Not a fun stint...but we are happy and mostly healthy now and glad to be out of the woods.
I wanted to share with you our Christmas cards from last year (top image is the front of the card, bottom image is the back). We did them so last minute that I didn't have time to share them last year. It's fun to remember these times and what a happy year that was. It's crazy to look at these two little rascals and think that there was ever a time when it was just the two of them. Baby M has already melded a place within all of our hearts and we can't wait to share this season with our sweet little girl. And I can't deny that I'm just a wee bit excited to delve into dolls, doll houses and the like. OK, I'm down right giddy about it.
So what about you? Are you super on top of getting your Christmas cards out early? I think we have a picture for our 2012 cards, now I just need to nail down the design (or order some from a company?). One of these years I'll make the card top priority and go all out...but for now, it's lucky we even get them out to family and friends by the 25th. Oh well, maybe next year...
|